Precursor + Renode
Precursor is an FPGA-based dev platform for secured applications. The reference design runs a VexRiscv CPU core plus a wide range of peripherals. Developing software for an embedded target can be a challenge in the best of circumstances, and when you’re starting out there is no display, no keyboard, not even a serial port – you might have a blinking LED and a few pads you can probe with an oscilloscope. Once you have something similar to JTAG up and running, you might be able to single-step the CPU and poke memory, assuming it hasn’t gone entirely into the weeds. That’s why I prefer to do embedded development using an emulator. In an emulator, when something crashes, you can observe the entire machine state, greatly speeding up the development process.
However, Precursor is FPGA-based, with bespoke gateware elements that evolve as hardware developers like bunnie reconfigure the system. As the software lead for Precursor, I have found that emulating it can be a challenge.
Fortunately, there’s Renode. Renode is a whole-system emulator designed to perform continuous integration on multiple devices. It is deterministic and makes it very easy to simulate systems with multiple cores and multiple heterogenous CPUs. It has support for various networks and has built-in emulation for common architectures such as ARM, RISC-V, PowerPC, and x86.
False Start: Extending qemu
The usual approach to emulating an embedded system is to fork qemu and add a new platform. This works if your platform already exists in qemu, or is reasonably similar to an existing one. It’s a tried-and-true approach, and one I’ve taken in the past.
With Betrusted, I initially tried to do this, however I quickly ran into several problems:
- It’s unclear how one is supposed to do this – There is no stable API, and it changes from version to version – qemu is a complicated program, and is constantly in flux
- It is difficult to build for Windows – It requires MSYS2 (or MinGW or Cygwin) and any changes require a recompile
- It requires a lot of code – Adding a platform is not straightforward and requires a lot of overhead, to the point where qemu doesn’t seem designed with extensibility in mind
Hackaday Supercon: A Chance Meeting
I had the pleasure of attending the Hackaday Superconference in Southern Califorinia in 2019. I had heard of Renode from my interactions with various open hardware groups, though I had not yet had a project that needed it. Betrusted had a simple validation firmware with a bouncing ball that merely demonstrated that its CPU and LCD worked. It also had a milled aluminum case that made it look good.
I knew Renode could be used to emulate RISC-V devices, but I wasn’t sure how complicated it would be to set up. The Renode developers said it would be trivial, and wouldn’t take more than a day or two at most. Intrigued, I challenged them: I gave them a SVD file generated by the LiteX build system an output binary, and a link to the Precursor SoC documentation. I also showed them what it looks like when running on real hardware.
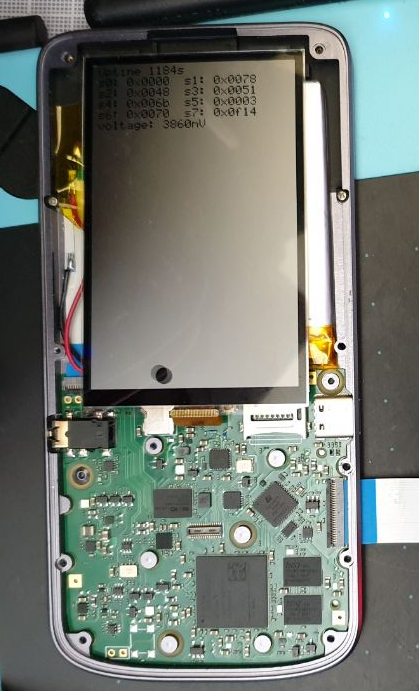
An early version of the firmware running on real hardware
After giving them this information, I went back to working on the FPGA toolchains we were building for the conference and left them to work on Precursor and Renode.
Imagine my surprise when, two hours later, they came back with this:
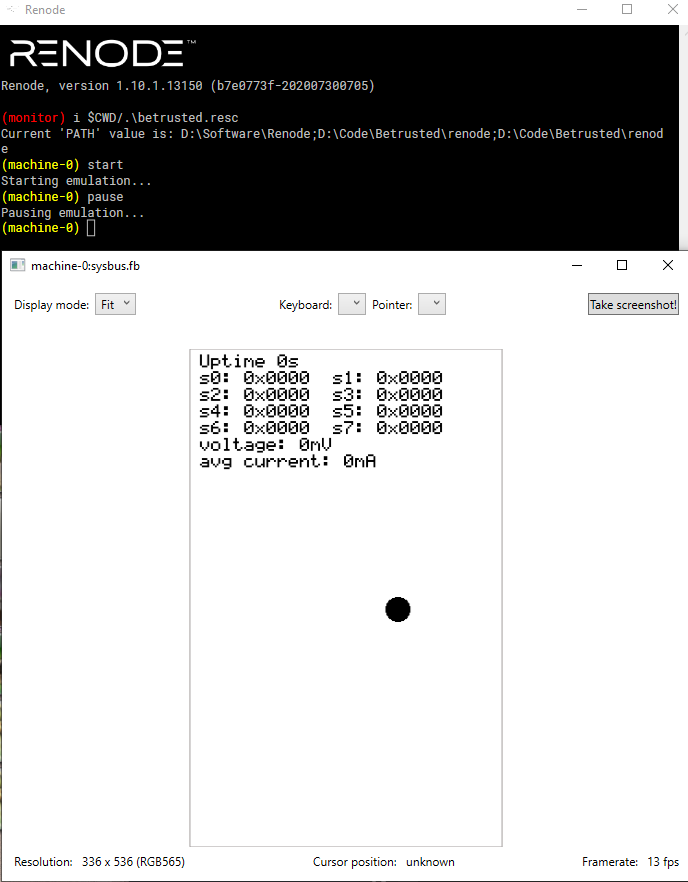
Renode running the Betrusted validation firmware
Clearly there was some magic there – how could they get it running so quickly? What was the trick?
Renode Configuration: All Text, All the Time
Renode’s configuration is done via .repl files, which define a REnode PLatform. This describes the memory layout of a device, along with various frequencies and interrupt mappings. This file is simply plain text, which is described in the Platform Description format documentation. Remapping a peripheral to a different area of memory is as simple as adjusting this platform description.
When configuring a platform, it is custom to run various commands in sequence in a script. This usually goes in a .resc file, which is simply a REnode SCript.
With these two files, you can create a device that consists of any combination of peripherals and cores supported by Renode.
However, Renode also makes it easy to create new peripherals.
Extending Renode: The Boon of C#
Renode is written in C#, which seems like an odd decision at first. Not many modern projects are written in C#, and certainly not many cross-platform ones. Certainly this is the first example I’ve come across.
The decision turns out to be a great advantage. The performance-critical code such as CPU cores are all written in a compiled language, and bindings are provided to C#. This allows for deterministic, fast execution of emulated code.
Peripherals are all written in C#, or occasionally in Python. This means they have a wide variety of constructs not normally available to lower-level languages such as C. This includes not needing to worry about memory management, and making it trivial to do things such as referring to files by an HTTP URL.
For example, Precursor has a specialized LCD that is 336 x 536 pixels in size. This unusual format brings with it an unusual framebuffer and an unusual set of controls. This is documented in the MEMLCD block, but the basic gist of it is: the framebuffer is divided into 536 lines of 336 pixels. Each line contains 44 bytes of 1-bit data which is rounded up in the framebuffer to 64 bytes, meaning 20 bytes are unused.
The MEMLCD block reuses these bytes to indicate whether a line is dirty – if any unused byte is nonzero, it updates the line.
The entirety of the Renode framebuffer Repaint() routine is implemented as follows:
protected override void Repaint()
{
    var newbuf = new Byte[44 * Height];
    machine.SystemBus.ReadBytes(bufferAddress, newbuf.Length,
    							newbuf, 0);
    for (int y = 0; y < Height; y++)
    {
        if (!updateDirty || updateAll ||
        ((newbuf[y * 44 + 0x2a] & 0x1) == 0x1)) {
        	for (int x = 0; x < Width; x++)
            {
                if (((newbuf[((x + y * 44 * 8)) / 8]
                	>> (x % 8)) & 1) > 0)
                {
                    buffer[2 * (x + y * Width)] = 0xFF;
                    buffer[2 * (x + y * Width) + 1] = 0xFF;
                }
                else
                {
                    buffer[2 * (x + y * Width)] = 0x0;
                    buffer[2 * (x + y * Width) + 1] = 0x0;
                }
            }
        }
    }
}
Any time the screen needs repainting, this function is called by Renode, and this is used to unpack the framebuffer onto the screen. A complicated process is distilled down into a single function.
All in all, the entire implementation of the framebuffer in C# weighs in at just under 96 lines of code for a fully-working module.
Develop-Compile-Test-Magic
The other thing C# brings is Eval(). With qemu, development requires the programmer to rebuild the binary. With Renode and C#, we just need to extend Renode by adding the source file as an include to the interpreter:
include @peripherals/memlcd.cs
This can be done in the Renode console, or in a script:
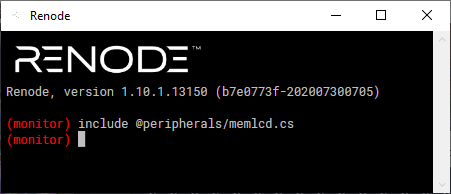
Using the Renode console directly
The end user doesn’t need to do anything special. They don’t need to install a compiler or use make, since it’s all handled automatically. The compiled .cs files have as much power and performance as built-in Renode peripherals, with the exception of the startup time when the file is compiled.
An Excellent Development Environment
C# was designed alongside Visual Studio, and as a result tooling around it is excellent. Visual Studio Code provides a similarly excellent environment while being cross-platform and easier to install.
Renode doesn’t have the best API documentation, but it’s reasonably easy to read existing peripherals to get an idea of how code should be structured, and then rely on code suggestions from the editor.
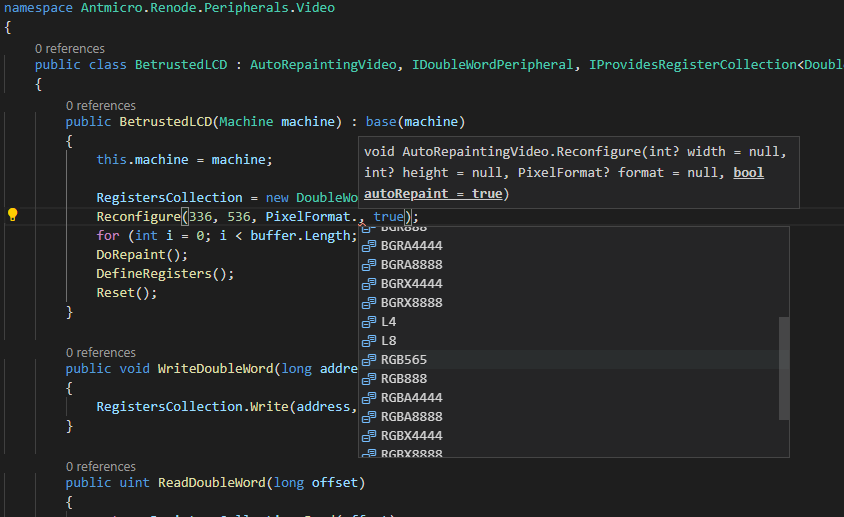
Auto-complete suggestions on an enum
C# is able to pull symbols and descriptions from the Renode binary code itself without needing any special development libraries installed. It’s able to perform syntax checks, give warnings, and even occasionally give suggestions.
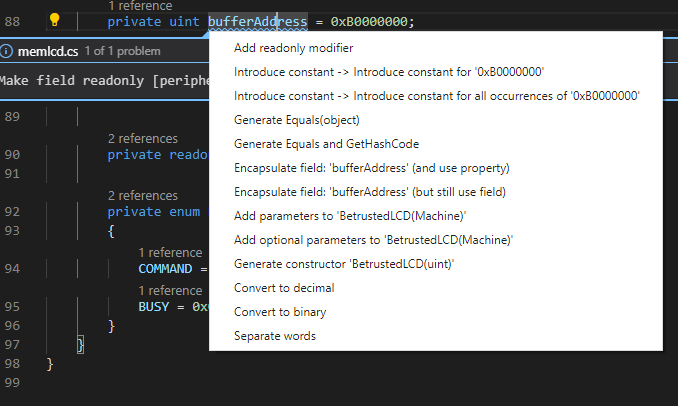
Visual Studio Code providing a warning and several solutions to the problem
Overall the development environment is excellent and makes it much easier to extend the hardware.
The Future of Betrusted + Renode
Renode was instrumental in developing the core of Xous (short for Xobs’ OS), my bespoke Rust-based OS for Precursor. Unusually for an embedded OS, Xous uses an MMU to enhance memory protection between processes. The transition from physical to virtual memory is quite tricky to get right and subtle problems with page table configurations can make it impossible for debuggers to inspect the state of the CPU. However, with Renode I was able to pick through the tea leaves in an emulated Precursor and now we enjoy virtual memory process isolation in Xous.
Renode also makes a good first step when it comes to developing on real hardware. It’s easy to give someone a copy of Renode and the board definition files for Precursor. It’s easy to develop new peripherals. If you want to get started with Renode, check out the Xous Core repository. With just a few commands, you too can be writing code for an emulated Precursor using Renode!
As we continue to build out the Precursor ecosystem, we’ll extend the Renode emulation layer to include many of the pieces we add. Eventually we may utilize the Continuous Integration aspects of Renode to perform code tests on check-in as a parallel track to the existing hardware CI infrastructure.
For now, Renode has proven a useful tool for initial hardware development and I look forward to using it as Precursor adds more and more hardware features.